Showing posts with label Winter. Show all posts
Tuesday, March 10, 2015
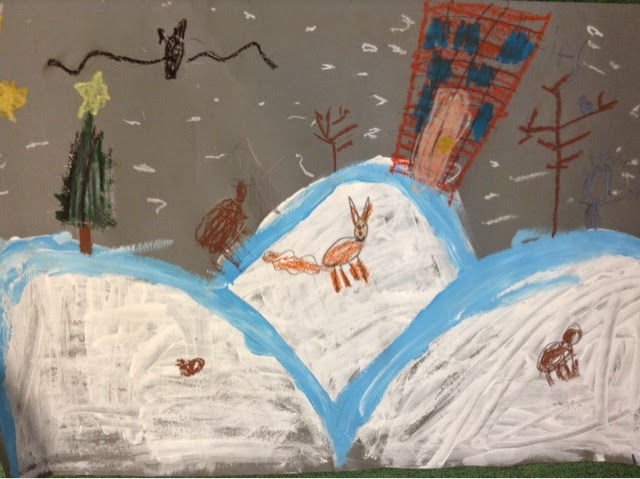
1st Grade- Owl Moon Landscapes
1st graders created landscapes inspired by the book Owl Moon. We used tempera paint, created a tint, and then added details with oil pastels the following class.
Thursday, February 5, 2015
Kindergarten Penguins
We finally had a snow day! And this project as the perfect filler for the classes that are ahead of others. We began this lesson by read Pierre the Penguin (such a cute book). We this discussed how we were going to make a portrait of a penguin. A portrait can be a picture of a person or animal.
Kindergarteners created penguins using geometric shapes. This also allowed us to practice our cutting and gluing skills.
Thursday, January 29, 2015
1st grade- Overlapping Winter Trees
1st graders discussed overlapping and created winter tree scenes. We made the trees out of construction paper and the snow with tempra paint and water mixed in a spray bottle.
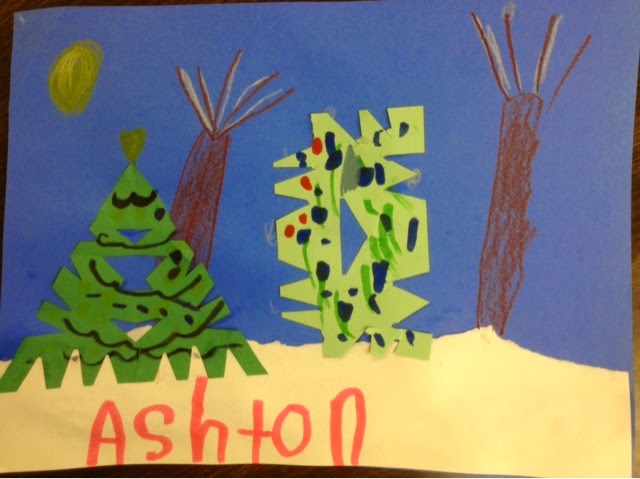
Kindergarten- Winter Ladscapes
Kindergarteners learned about landscapes and created winter scenes. We tore white paper for the snow, drew on the trees with colored pencil. And created the pine trees by folding paper, cutting a diagonal line, and cutting triangles out of the edges. Lastly, students added extra details.
Friday, January 16, 2015
Kindergarten Snowflakes
Kindergarteners made snowflakes. They enjoyed using thier scissors with control and being able to distinguish the folded edge. It was amazing to see how surprised they were when they opened their snowflakes.
Poinsettia
1st grade made beautiful poinsettias by usiing red, green, white, and gold paint. We discussed that when you mix a color with white it is called a tint and that is what studnents did when they made the highlights on their paintings.
2nd grade Snowy Landscapes
2nd grade created winter landscapes by using tints in the background to create mountains. After the paint dried, we creted trees out of silhoettes. Finally, we added snow falling down in the foreground.
Tuesday, March 11, 2014
Kindergarten- Penguins
We started this lesson by reading the book Pierre the Penguin, A True Story. It is such a cute book. We first added torn white paper to create the snow, then we cute black construction paper for the body, arms, and head. Then we cut white construction paper for the belly and eyes. Next, we cut orange construction paper for the beak and feet. Lastly, students used a white crayon to add snow falling or stars. This we a tough lesson to complete in 50 minutes.
1st Grade- Moose
We had 25 minutes of class to spare, so instead of allowing the students to free draw, I decided, why not do a quick painting lesson?
I gave the students paint, paint brushes, and a water cup and we got to work. We didn't draw with pencil beforehand so they really had to focus what they were doing so they wouldn't make a mistake. I did my painting step by step on the smart board and students followed along. Some enjoyed painting without planning ahead, while others were stressing out. If I were to do this project again, we would draw it with pencils first, except we were in a time crunch this time.
First Grade- Overlapping Winter Trees
I think I need to stop doing winter projects, it's probably the cause of all the snow we have been getting this season.
This one is an easy one day project. Each student picked out 4 green pieces of construction paper, preferably all different shades. one 18 x 12, two 12 x 9, and one 6 x 9. We folded all of our papers in half "hot dog style". next we drew diagonal zig-zag lines. This was a little tricky. And we didn't want the lines to be too crazy because we had to cut them out later. After that, we had 4 pine trees.
Next we glued our pine trees onto our background paper; I had the students choose between purple or black. We glued the biggest one first, then medium size, then small. We realized we had to overlap our trees to fit them all on our paper. We added trunks to the bottom of our trees.
Last, students brought their papers to the spraying station where they used spray water bottles (old Windex bottles will work too) filled with half white paint, half water. They sprayed their paper a few times to create snow falling.
Labels:
1st grade,
Landscape,
Overlapping,
Seasonal,
Winter
Tuesday, February 4, 2014
Adaptive Art-Snowflakes
This lesson could go with any book, we read Snow Days. After reading the book, students painted on a pre taped paper using blue, magenta, and purple. Make sure to use painters tape so it comes of easily.
Adaptive Art-String of Lights
We read the book, Light The Lights! A Story About Celebrating Hanukkah And Christmas and then created a string of lights using fingerprints. Students first drew a squiggly line and drew squares along the line. Above each square, they did a fingerprint.
Thursday, January 30, 2014
3rd Grade- Snow Measurers
These were perfect for the amount of snow we received just before making the project. One side looks like a snowman while the other acts like a ruler to measure the snow. These are make out of foam board.
3rd Grade- Snowflakes
This was a one day project to make decorations for our winter choir performance.
Students received 3 different size squares and cut them into snowflakes. They then glued the snowflakes to a cool color paper. Students added a different colored paper to the top and bottom of their project. Lastly, they put glue and glitter on their project.
Wednesday, January 29, 2014
1st Grade- Bouncy Snowmen
With all of the snow we received in early January, some of my classes got ahead of others. This was a filler lesson. It took one class and the kids loved it.
After tracing two circles, we folded the bigger one in half and cut slits on the folded edge and the open edge. You want the slits to stagger each other yet cross paths (kind of like a zipper) this allows the paper to stretch or in this case "bounce"
Students then glued the two circles together and added details using markers, crayons, and scrap paper.
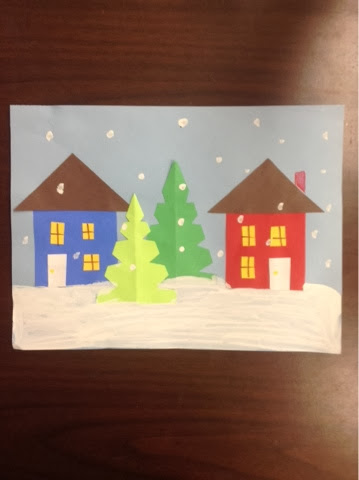
Kindergarten- Snow Houses
We created a snow village scene by cutting 3 inch squares and white paint. We glued squares down directly for the house shapes. We cut the squares in half vertically for the roofs. We cut the squares into little squares and rectangles for the doors and windows. Finally, we folded the squares in half and cut the squares to create pine trees. After gluing everything, we added white tempera paint to create snow.
Kindergarten- Owl Moon
After reading the book Owl Moon, kindergarten created snowy landscapes.
We drew the background trees using construction paper crayons. Secondly, we added the snowy ground using torn paper. Then we added the pine trees by folding paper in half and cutting. Lastly, students added details such as snow and moons using crayons.
Subscribe to:
Posts (Atom)